What follows is a write-up of a reverse engineering war game series, reversing.kr.
The war games have players reverse Windows, Linux, and macOS binaries. The players get a flag if they succeed in compromising the application.
Showing gratitude to the creators of the war game, I will abide by their rules and only publish the solution to those challenges that already have other solutions online. I will not post solutions to challenges that no one else has solved publicly.
[!] Friendly Warning: Some of the binaries are malicious. Some of these are: Easy Unpack, Ransomware, and Twist1. Do not run these binaries outside a sandbox.
[*] Status: IN-PROGRESS
Level 0: Easy Crack
Solution
Inspecting the file in Binary Ninja:
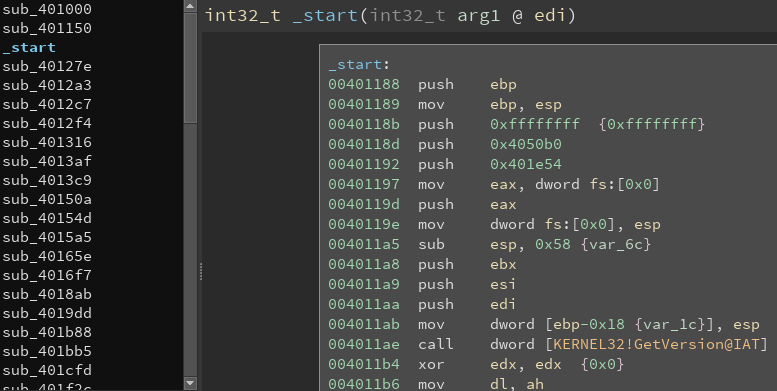
Initially I was going to use Binary Ninja to complete the challenge. However, as you can see, it shines very little light on the program. Hence, I decided to use IDA.
Inspecting the file with IDA:
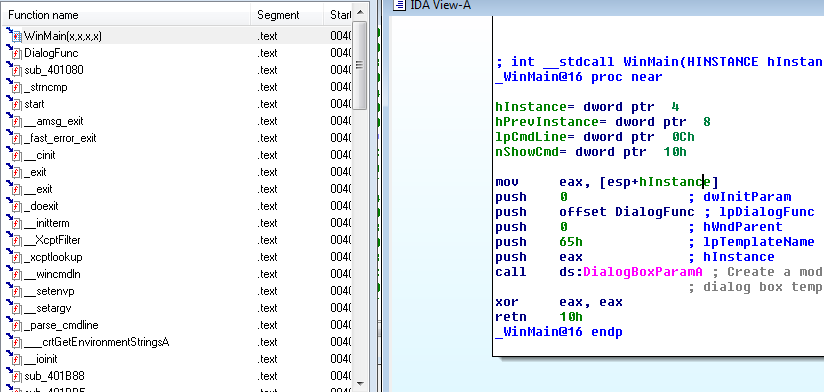
Notice the push to the lpDialogFunc.
Inspecting lpDialogFunc:
The sub_401080 function might be interesting.
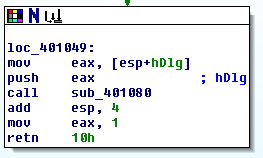
Inspecting the sub_401080 function:
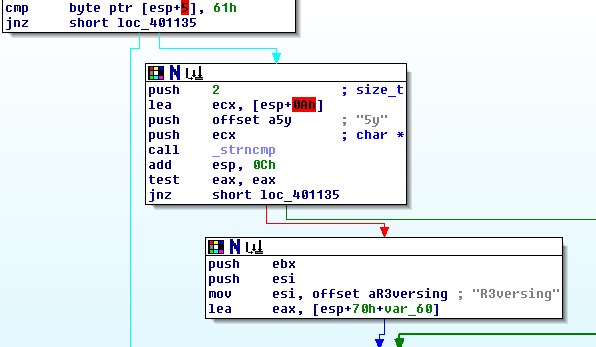
Notice straightaway that we see the text “a5yR3versing”.
There’s a letter “E” missing in there somewhere.
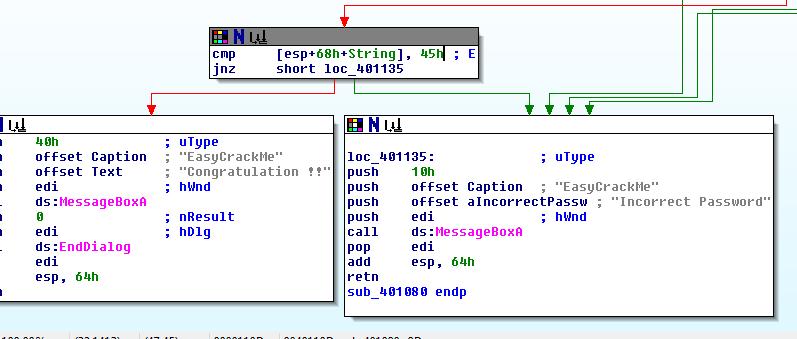
The missing “E” can be found further below, in a comparison to its hex equivalent, 0x45.
It looks like I have the flag.
Flag: Ea5yR3versing
Proof:

Level 1: Easy Keygen
Instructions
Find the Name when the Serial is 5B134977135E7D13
Solution
Inspecting the file with IDA:
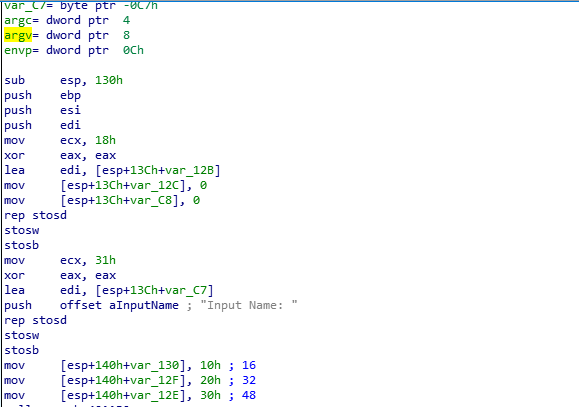
Note that there is an array of three integers (16, 32, 48), and that the username (input name) is eight (8) characters long.
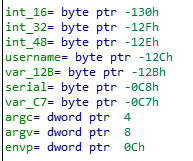
Renamed for convenience:
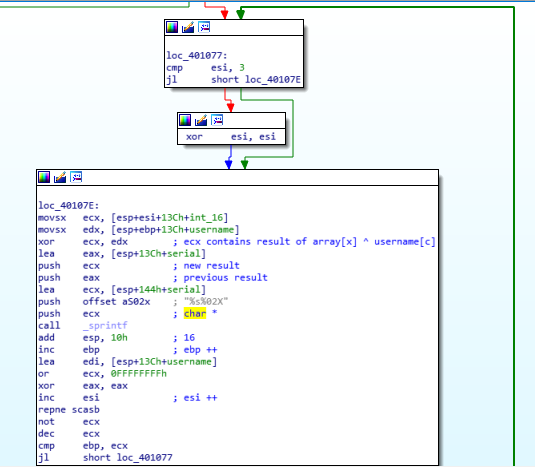
loc_401077:
ESI is compared against 3.
If it’s less than three, it jumps to loc_40107E
If it’s greater than three, ESI is cleared by XOR.
ESI is clearly the counter that cycles through the three integers.
Throughout this process, the username is being XOR’ed against the three integers:
16, 32, and 48
Since the goal is to find the name given the serial number, we can use repeating-key XOR decryption using the integer array and the serial number to find the name.
Crafting the solution:

Getting the answer:
python keygen.py

Proof:

Level 2: Music Player
Instructions
This MP3 Player is limited to 1 minutes.
You have to play more than one minute.
There are exist several 1-minute-check-routine.
After bypassing every check routine, you will see the perfect flag.
Solution
Several clues are given right off the bat.
The goal: To bypass the 1-minute play limit.
To do this, we have to bypass “several” check routines.
Since the challenge does not provide any MP3 file, I searched for a random sample online.
Running the player:

The player pukes out an error, which is probably in Korean and is not displaying properly.
Inspecting the file with IDA:
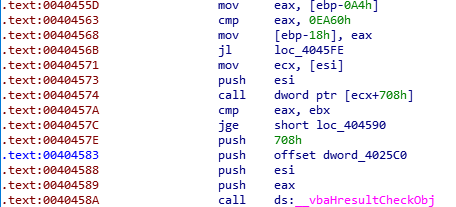
0EA60H translates to 60000 (milliseconds), which translates to 60 seconds.
We have discovered the first check to bypass.
Further down, we find the following:

This looks like part of a flag?
The other check to bypass can be found further below:
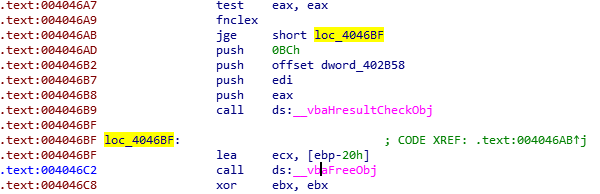
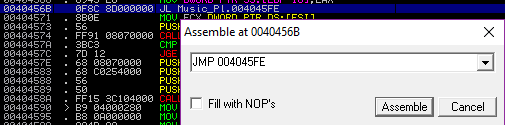
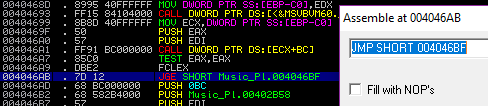
We will bypass these by changing the instructions to simple JMP instructions.
Changing the instructions using Immunity Debugger:
Bypass the first check:
Bypass the second check:
Save the modified executable:
Right-click in the CPU pane -> Copy to executable -> All modifications
Right-click in the File pane -> Save file -> Name to whatever

Running the modified executable:

Flag: LIstenCare
Proof:

Level 3: Replace
Solution
Running the file:
The program crashes upon entering a number and hitting “Check”.
Inspecting the file with OllyDbg and IDA:
The challenge is titled “Replace”, and there are multiple references to a “Replace” function.
Just as in the previous challenges, this probably means we are going to have to modify instructions.
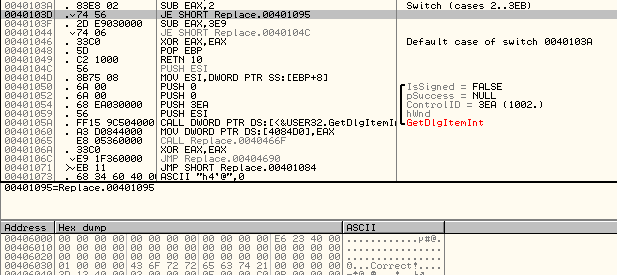
0040103D . 74 56 JE SHORT Replace.00401095
This jumps past the address which has the “Correct!” string.
So, it makes sense to follow the tip to replace that instruction.
Let’s NOP it.
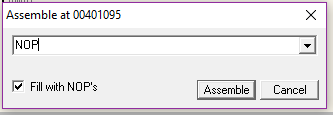
Replacing 401095 with NOPs:
Double-click on 401095 -> Check “Fill with NOP’s” -> Enter “NOP” -> Assemble
Checking the program:
Enter “1” and press “Check”.

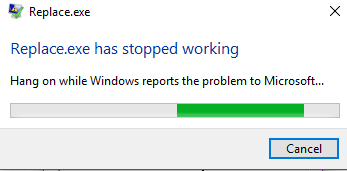
The program crashes, as expected.
Notice the value in EAX: 601605CC
Repeating the process with “2”, “3”, etc. reveals a pattern.
With 2: 
With 3: 
Pattern:
601505CB + <Input> = EAX value
Whatever value is in EAX has two bytes overwritten by NOPs.
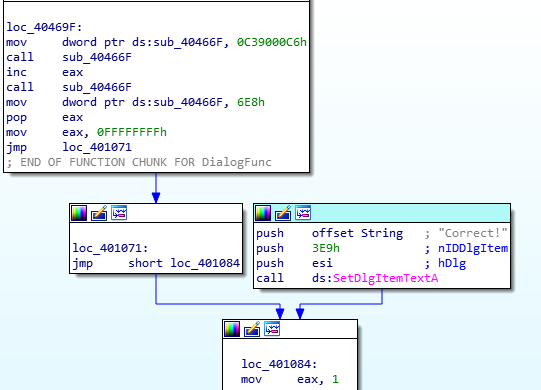
Coincidentally, the OPCODE for 0x401071, which jumps over the “Correct” section, is two bytes long.
The solution is to overwrite 0x401071, so we can slide into “Correct”.

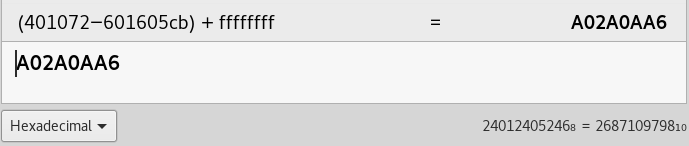
The simple math behind the solution:
x + 601605CB = 401072
x = (401072 – 601605CB) + FFFFFFFF
x = A02A0AA6
x in decimal = 2687109798
Entering the result into the program:

Flag: 2687109798
Proof:

Level 4: ImagePrc
Solution
Running the file:
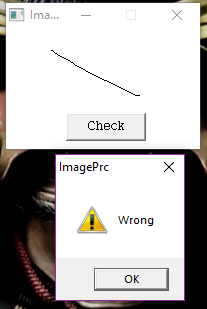
The program lets us draw and check if the drawing is the correct answer.
Inspecting the file with IDA Pro:
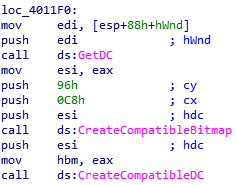
96h = 150 (height)
0C8h = 200 (width)
These are the height and width of the target BMP image.
We also see:
From this we know that the target image is 200×150, and that it is being loaded from the binary as a resource.
Creating an empty BMP file:
We save it as a 24-bit Bitmap file.
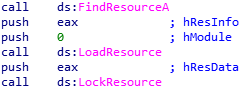
Inspecting the resource:
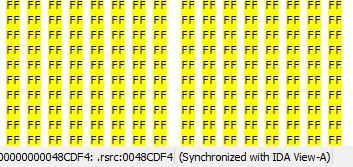
Pasting this should give us the answer.
Since it proved hard to copy the contents from IDA, I decided to use the ResourcesExtract software to extract the file.
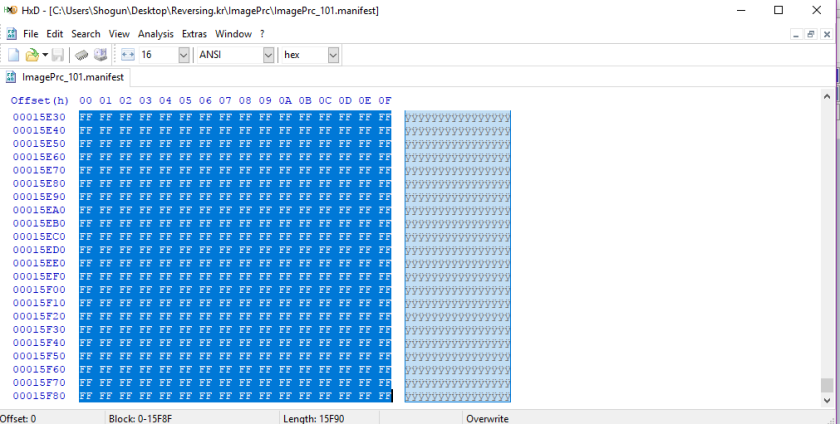
Extracting the resource:

The extract gives us a manifest file. Opening the manifest file reveals that we have everything we need to solve the challenge.
Copying the resource contents using HxD:
Pasting the contents into the BMP file and saving:
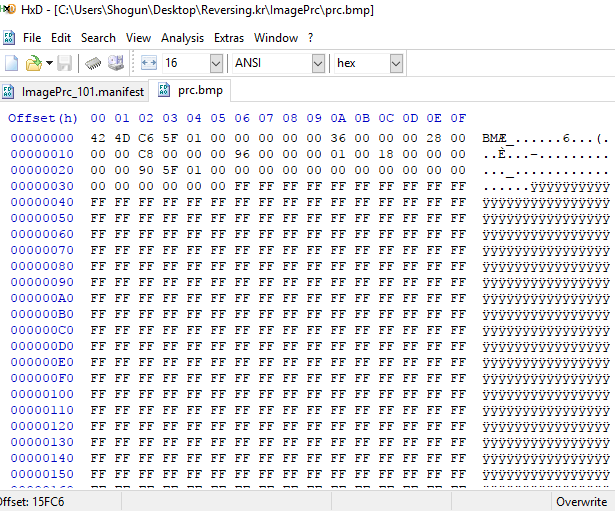
Note that we replace everything but the header.
The modified file:

Flag: GOT
Proof:

Level 5: Position
Instructions
ReversingKr KeygenMe
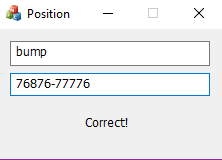
Find the Name when the Serial is 76876-77776
This problem has several answers.
Password is ***p
Solution
Running the program:
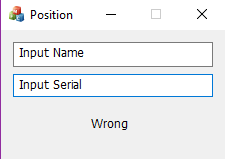
The program takes in a name and a serial number (76876-77776).
We are provided with the serial number and have to find the name.
We know that the solution ends with the letter “p”.
Inspecting the binary with IDA Pro:

A call to loc_401CF0 determines the outcome – whether the inputs are correct or not.
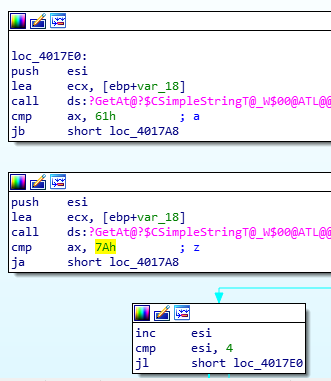
This loop checks for the first four characters of the name being lowercase letters (a-z).

Several checks follow:
First, the program checks for the letters in the name being different.
Second, it checks for the serial being 11 characters long, and the fifth character being “-“.
Finally, a lengthy comparison routine occurs which leads to our solution.
The lengthy routine seems complicated at first, but is actually quite simple as long as you keep track of assignments.
CString Reference:
GetAt: https://msdn.microsoft.com/en-us/library/aa314338(v=vs.60).aspx
GetBuffer: https://msdn.microsoft.com/en-us/library/aa314880(v=vs.60).aspx
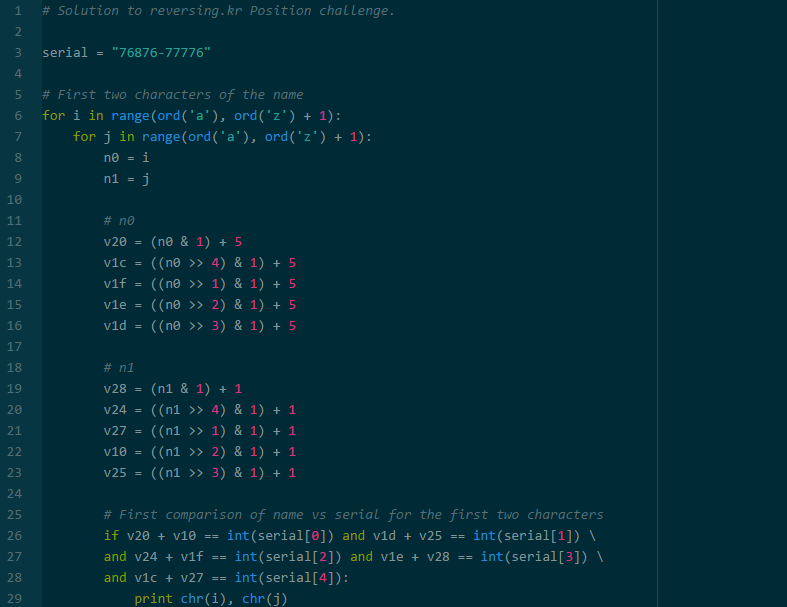
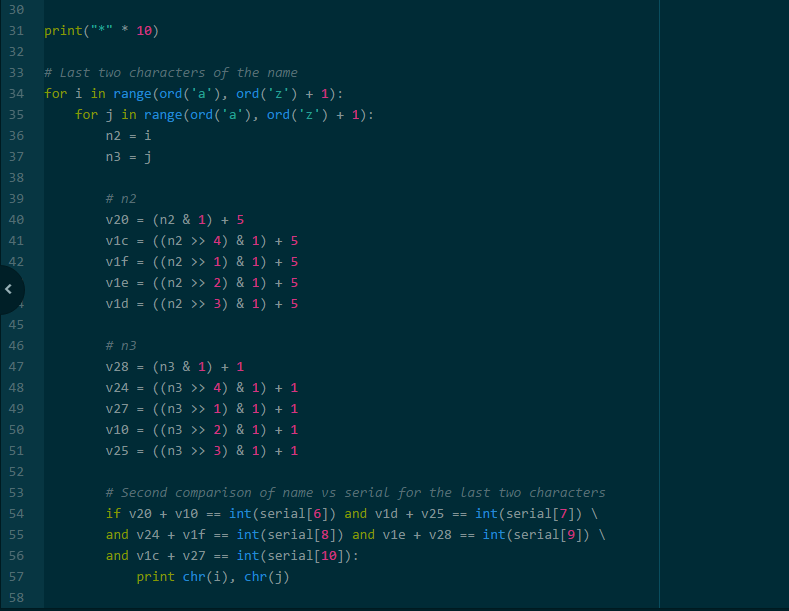
The easiest way to solve this is to write code as we read along.
Translation of Assembly to Python:
Running the solution program:
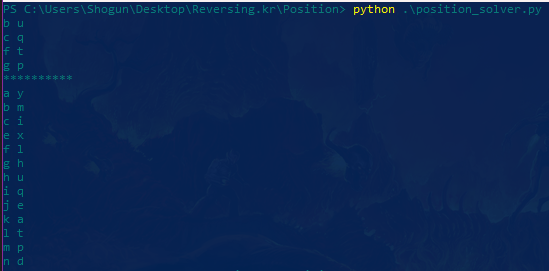
Since we know the password ends with “p”, the following are the possible options:
bump
cqmp
ftmp
gpmp
Flag: bump
Proof:

Level 6: Direct3D_FPS
Solution
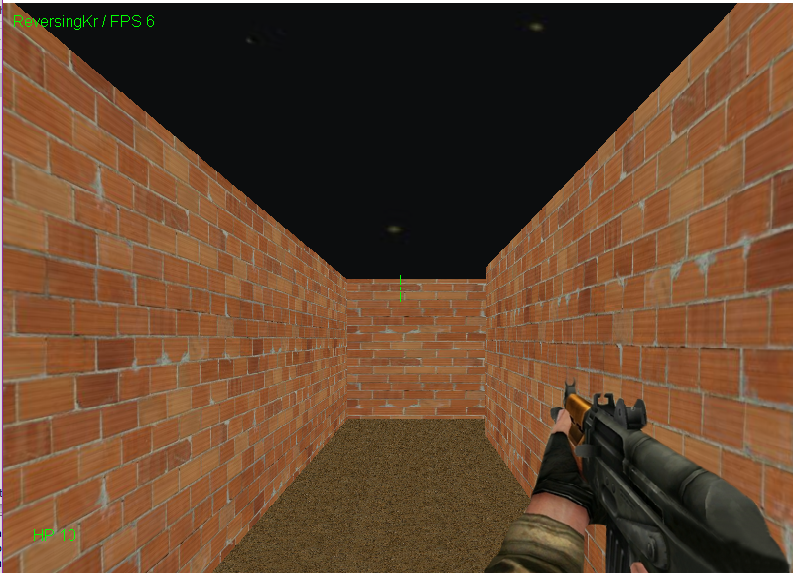
This time we are playing a First Person Shooter (FPS), where we get to kill, or rather get killed, by enemies.
Inspecting the binary with IDA Pro:
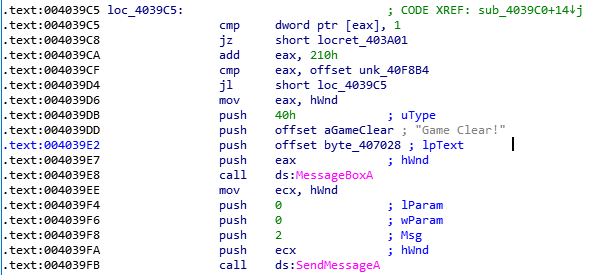
This is the function that is triggered when we win the game. It outputs the flag, which starts at byte_407028.
We can confirm this is true by also looking at the binary in Immunity Debugger, as seen below.

Reading the flag and measuring it:
Ctrl-C the flag in Immunity Debugger.
Open a terminal and use Python to measure the length of the encrypted flag.

We can see that the flag is encrypted, and that it is 50 bytes in size.
Checking cross-references to the flag:
Ctrl-X to list cross-references.
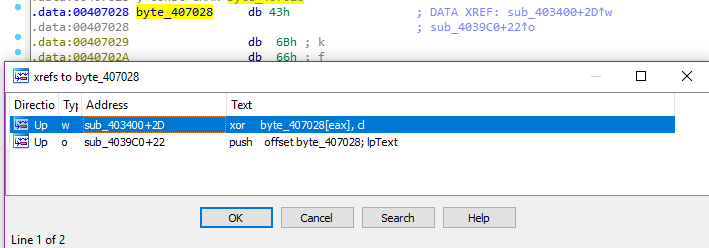
Analyzing the function that references the flag:
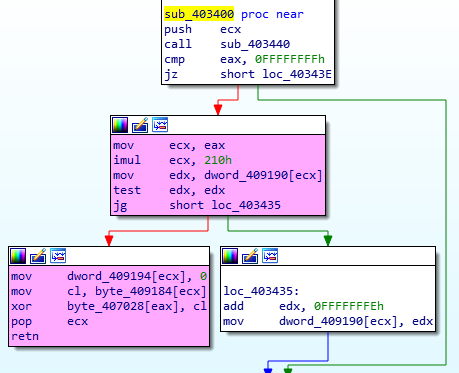
The function performs the following calculation for each character in the flag:
xor_offset + (char * 0x210)
char_offset ^ xor_offset
Where:
xor_offset = 409184 + char
char_offset = 407028 + char
To be able to solve this it is necessary to set a breakpoint and run the program in a debugger.
We can do all of this within IDA.
Setting the breakpoint:
Set a breakpoint at: mov dword_CC9194[ecx], 0
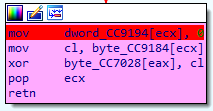
Now we have to run the program and commit suicide. We hit the breakpoint when we commit suicide, as our HP hits 0.
Running the program and executing our code:
Choose a debugger in IDA -> Hit the “Play” icon.
Commit suicide in the game by running into an enemy and staying there until HP hits zero.
Run the following Python code within IDA:
xor_offset = <TBD>
char_offset = <TBD>
print bytearray([(Byte(char_offset + i) ^ Byte(xor_offset + (i * 0x210)) ) for i in range(50)])
In my case:
char_offset = 0xCC7028
xor_offset = 0xCC9184

Flag: Thr3EDPr0m
Proof:

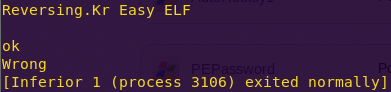
Level 7: Easy ELF
Solution
Run the program:
chmod u+x Easy_ELF
gdb -q ./Easy_ELF
r
Analyzing the program in Binary Ninja:
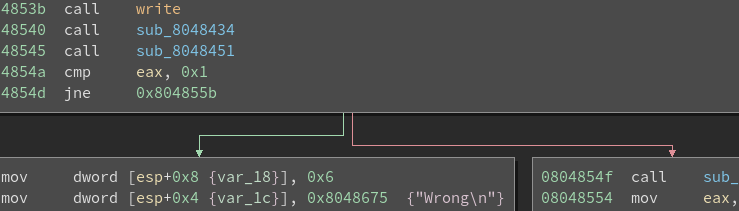
We can see that the functions that determine the outcome are sub_8048434 and sub_8048451.
Analyzing sub_8048434:
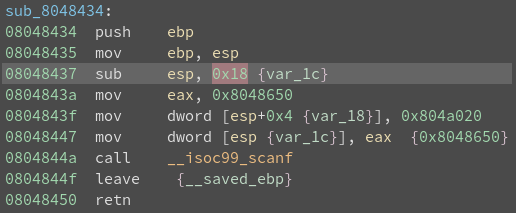
No checks here. Moving on.
Analyzing sub_8048451:
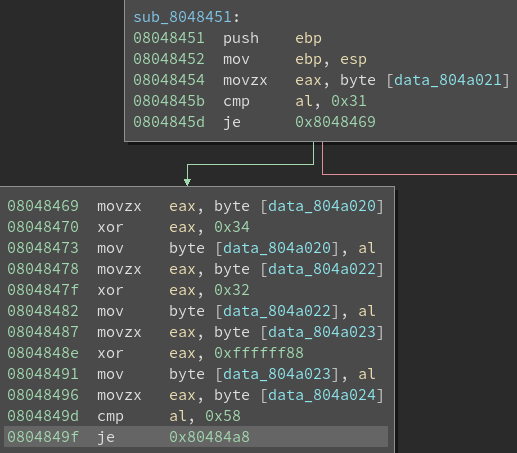
Translation:
first_char ^ 34
second_char = 31
third_char ^ 32
fourth_char ^ ffffff88
fifth_char = 58
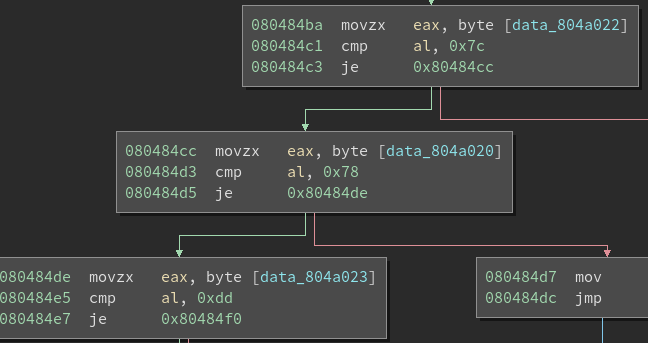
Translation:
third_char = 7c
first_char = 78
fourth_char = dd
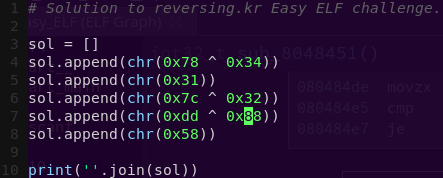
Solution:
78 ^ 34
second_char = 31
7c ^ 32
dd ^ 88
fifth_char = 58
Crafting the solution:
vi easy_elf.py
Solving the challenge:
python easy_elf.py

Flag: L1NUX
Proof:

Level 8: WindowsKernel
Instructions
Please authenticate to lowercase.
Solution
…
